Join on WhatsApp
Get the latest updates directly on WhatsApp – motivation, news & more!
 Join On WhatsApp
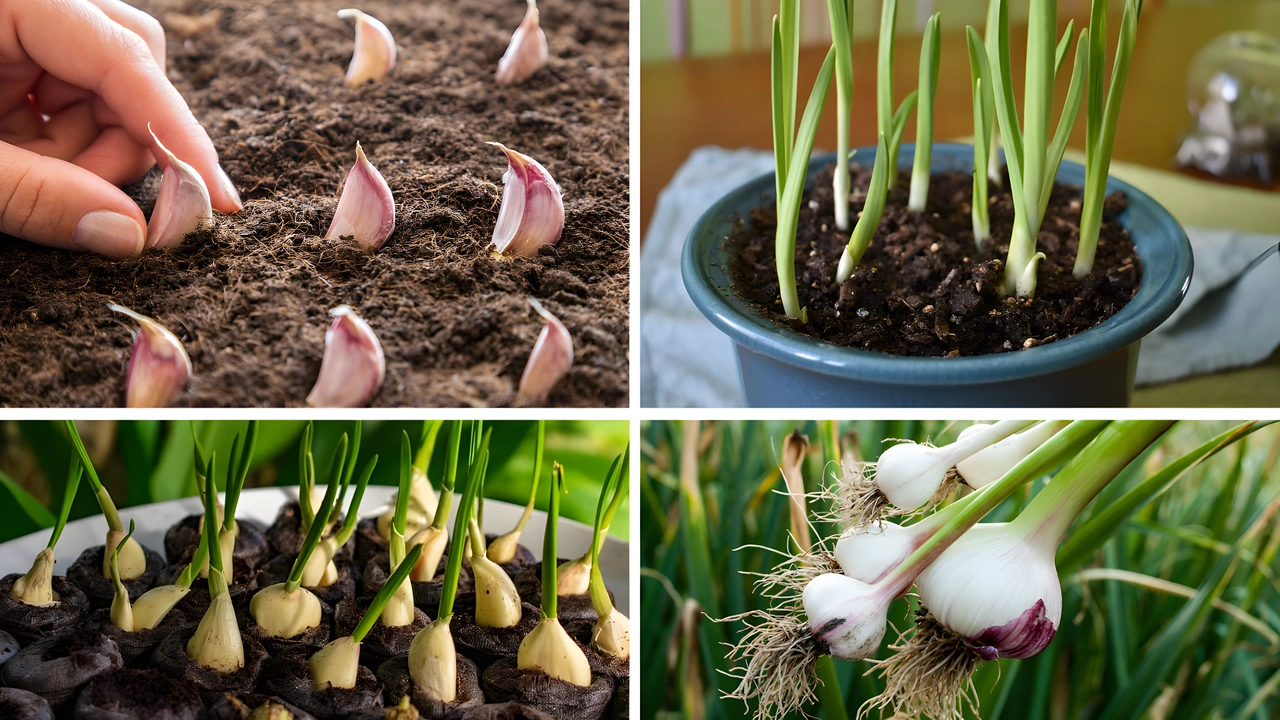
If you’ve ever used garlic in cooking, you’ve probably wished for fresh, flavorful cloves at your fingertips. The good news is—you don’t need a large garden or special equipment. This is how to grow garlic at home, explained in a beginner’s step-by-step planting guide designed to help you produce your own fresh garlic cloves with ease. Garlic is one of the most rewarding crops for beginners: it’s low-maintenance, pest-resistant, space-efficient, and yields highly nutritious bulbs. This guide takes you through the entire process from clove to harvest so you can enjoy the bold flavor and health benefits of homegrown garlic all year long.

1. Understanding Garlic Types for Growing at Home
The first step in how to grow garlic at home is understanding the two main types of garlic: hardneck and softneck. Each has different growing requirements, and choosing the right type is essential for beginners wanting to grow fresh garlic cloves successfully at home.
Garlic Type Comparison Table
| Garlic Type | Best for | Climate Suitability | Flavor Profile | Storage Life |
|---|---|---|---|---|
| Hardneck | Cold regions | Zones 3–7 | Bold, complex | 4–6 months |
| Softneck | Warm regions | Zones 8–11 | Mild, classic | 6–9 months |
- Hardneck garlic produces fewer but larger cloves and also grows a flowering stalk known as a scape (which is edible).
- Softneck garlic does not produce scapes and is better suited to warmer climates. It usually stores longer than hardneck types.
For beginners growing garlic at home, start with softneck garlic if you’re in a warm region, and hardneck if you’re in a colder one. This foundational step ensures you start your planting guide for fresh cloves on the right path.
2. When to Plant Garlic at Home: Seasonal Timing for Beginners
Another critical step in how to grow garlic at home is knowing when to plant. Garlic is typically planted in the fall, although it can be planted in early spring in some areas. Fall planting gives garlic a longer growing season, which results in larger bulbs.
Garlic Planting Seasons
| Climate Zone | Planting Season | Notes |
|---|---|---|
| Zones 3–7 | Mid to late October | Cold-hardy garlic preferred |
| Zones 8–10 | November to January | Mulch to protect from warm winters |
| Spring planting | March to April | Smaller bulbs likely, but still viable |
For beginners, the fall season is ideal. The cloves establish roots before the ground freezes and go dormant during winter. This results in robust growth and fresh garlic cloves ready for harvest by midsummer.
3. Selecting and Preparing Cloves: Key Planting Guide for Fresh Garlic Cloves
This beginner’s step-by-step planting guide wouldn’t be complete without the proper method to select and prepare cloves. Grocery store garlic is often treated to prevent sprouting, so always buy seed garlic from a nursery or online store.
How to Prepare Garlic Cloves for Planting:
- Break the bulb apart into individual cloves—do this right before planting.
- Keep the papery skins intact on each clove.
- Select the largest cloves for planting—these will yield the best bulbs.
The root end goes down, and the pointed end faces up. If you’re truly learning how to grow garlic at home, this step is crucial—only healthy, disease-free cloves will yield fresh, flavorful garlic cloves later on.
4. Soil Preparation: The Bedrock of This Garlic Planting Guide
The success of your garlic crop depends largely on the quality of the soil. As you follow this beginner’s step-by-step planting guide, make sure you prepare a loose, well-drained bed. Garlic hates soggy soil.
Ideal Soil Conditions for Garlic:
| Soil Attribute | Requirement |
|---|---|
| Texture | Loamy and crumbly |
| pH | 6.0 to 7.0 |
| Drainage | Excellent; raised beds or containers recommended |
| Organic Matter | High (use compost or aged manure) |
Use a garden fork or tiller to loosen the soil at least 8 inches deep. Mix in compost to improve fertility. If you’re learning how to grow garlic at home in containers, use a pot at least 10 inches deep with good drainage holes. Good soil prep ensures healthy roots and maximum yield of fresh cloves.
5. Planting Garlic at Home: A Step-by-Step Beginner’s Guide
Now that your cloves and soil are ready, here’s the planting process detailed in this beginner’s step-by-step planting guide for fresh cloves:
Step-by-Step Garlic Planting Instructions:
- Spacing: Place cloves 4–6 inches apart, with rows 12 inches apart.
- Depth: Plant each clove 2 inches deep.
- Orientation: Pointed end up, flat end down.
- Cover: Backfill with soil and gently press down.
- Mulch: Add 2–4 inches of straw or shredded leaves to protect cloves from cold.
Mulching helps suppress weeds and maintains soil temperature. For anyone new to gardening, this part of how to grow garlic at home is straightforward and can be done in under an hour.
6. Garlic Care Through the Seasons: Growing Fresh Cloves Made Simple
Garlic requires minimal care, which is why it’s perfect for beginners. But to maximize your harvest, a few simple tasks can make a big difference.
Garlic Maintenance Tips for Beginners:
- Watering: Water lightly after planting. Increase watering in spring as shoots emerge. Stop watering 2–3 weeks before harvest.
- Fertilizing: Apply a nitrogen-rich fertilizer (like fish emulsion) once a month from March to May.
- Weeding: Keep the area weed-free—garlic doesn’t like competition.
- Scape Removal: For hardneck varieties, remove garlic scapes in early summer to redirect energy to bulb growth.
By following these tips, your garlic will grow stronger and fuller. These steps simplify how to grow garlic at home while increasing your chances of harvesting plump, fresh garlic cloves.
7. Harvesting and Curing Garlic: Final Stage of the Beginner’s Guide
Knowing when and how to harvest garlic is the last important step in this planting guide for beginners at home. Garlic is ready to harvest when the lower leaves begin to brown and the upper leaves remain green—usually in mid to late summer.
How to Harvest and Cure Garlic:
- Loosen soil with a fork or trowel.
- Lift bulbs gently—don’t yank by the stem.
- Do not wash—leave the soil on.
- Cure bulbs by hanging them in a cool, dry, well-ventilated area for 2–3 weeks.
- Trim roots and stems after curing and store in a mesh bag or basket.
Proper curing ensures your garlic stores well and retains full flavor. This completes your journey in learning how to grow garlic at home from clove to bulb. Once cured, your fresh garlic cloves will be ready for use in the kitchen.
How to Grow Garlic at Home: A Beginner’s Step-by-Step Planting Guide for Fresh Cloves – Final Thoughts
This complete beginner’s step-by-step planting guide for fresh cloves has walked you through everything you need to know about how to grow garlic at home. From choosing the right type of garlic to preparing the soil, planting cloves, caring for the plant, and finally harvesting and curing—each step contributes to a successful home garlic harvest.
Growing garlic at home is not just cost-effective but also deeply satisfying. With minimal effort, you can produce months’ worth of fresh garlic cloves that are more flavorful and nutritious than store-bought alternatives. Whether you’re planting in a garden bed or a small pot on your patio, this guide equips you with all the knowledge you need. Now that you know how to grow garlic at home, it’s time to grab your cloves and start planting!