
Join on WhatsApp
Get the latest updates directly on WhatsApp – motivation, news & more!
 Join On WhatsApp
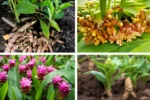
Growing and caring for lady finger (also known as okra) is a fulfilling gardening experience that offers nutritious, tasty pods right from your backyard. If you’re aiming for healthy harvests, understanding how to grow and care for lady finger is crucial. This guide provides everything you need to start, maintain, and succeed in cultivating lady finger—whether you’re a beginner or a seasoned gardener. From soil preparation to pest control, and from seed selection to harvesting tips, you’ll learn exactly how to grow and care for lady finger to achieve a lush, productive garden.

1. Understanding the Lady Finger Plant
Before diving into how to grow and care for lady finger, it’s important to understand the plant itself. Lady finger, or Abelmoschus esculentus, is a flowering plant from the mallow family. It thrives in warm climates and produces green, slender pods that are widely used in cuisines around the world. Known for its rapid growth and minimal maintenance, the lady finger plant is ideal for both home gardens and small farms.
To effectively grow and care for lady finger, you need to be aware of its lifecycle. The plant typically matures in about 50 to 70 days and continues to produce pods for several weeks when well-maintained. Its heat tolerance and adaptability make it a favorite among gardeners in tropical and subtropical regions.
2. Choosing the Right Climate and Location to Grow Lady Finger
If you want to successfully grow and care for lady finger, choosing the correct location is key. Lady finger loves heat and full sunlight. The plant needs 6 to 8 hours of direct sunlight daily to produce healthy flowers and fruit. Temperatures between 75°F and 95°F (24°C to 35°C) are ideal.
Avoid planting lady finger in low-lying areas where water may stagnate. Lady finger roots do not tolerate soggy conditions. Raised beds or well-drained garden plots are best to grow and care for lady finger effectively.
3. Soil Preparation to Grow and Care for Lady Finger
One of the most vital steps to grow and care for lady finger is soil preparation. Lady finger prefers loamy, well-drained soil that is rich in organic matter. The ideal pH range for lady finger soil is between 6.0 and 6.8.
Before planting, till the soil to a depth of at least 12 inches. Mix in well-rotted compost or manure to enhance fertility. If your soil is clay-heavy or poor in nutrients, consider using raised beds or adding sand to improve drainage.
Soil Preparation Table for Lady Finger
| Soil Factor | Optimal Range for Lady Finger |
|---|---|
| Soil Type | Loamy, well-draining |
| Soil pH | 6.0 – 6.8 |
| Organic Matter | High (add compost or manure) |
| Depth for Tilling | 12 – 15 inches |
| Drainage | Excellent (avoid waterlogging) |
4. Sowing Seeds and Germination Tips to Grow Lady Finger
To grow and care for lady finger efficiently, start with high-quality seeds. Lady finger seeds are best sown directly into the soil, as transplanting can damage their delicate roots.
- Planting Depth: Sow seeds about 1 inch deep.
- Spacing: Keep at least 12 to 18 inches between plants.
- Germination Time: 5 to 10 days, depending on temperature.
Soaking the seeds in warm water overnight before planting can improve germination rates. This simple step is crucial in your journey to grow and care for lady finger successfully.
Once the seedlings emerge, thin out the weaker ones to ensure proper airflow and reduce disease risks. The healthier the spacing, the better your chances for productive harvests.
5. Watering and Nutrient Management for Lady Finger Care
Consistent watering is essential when you grow and care for lady finger. However, overwatering can cause root rot and fungal issues. Water the plants deeply once or twice a week, depending on your local climate and soil type.
- During the flowering and pod development stage, increase watering slightly.
- Use mulch around the base of the plants to retain soil moisture and regulate temperature.
In terms of nutrients, apply a balanced fertilizer (e.g., 10-10-10 NPK) when the plants are about 4 weeks old. For organic gardens, compost tea or fish emulsion works well. Proper feeding supports robust growth and improves pod quality, making it easier to grow and care for lady finger successfully.
6. Pest and Disease Control While Growing Lady Finger
When you grow and care for lady finger, protecting your plants from pests and diseases is crucial. Common pests that affect lady finger include:
- Aphids
- Whiteflies
- Spider mites
- Caterpillars
Use natural remedies like neem oil spray, or introduce beneficial insects such as ladybugs to control these pests.
Diseases like powdery mildew, fusarium wilt, and leaf spot can affect lady finger plants if not monitored. Rotate crops each season and avoid overhead watering to prevent fungal outbreaks. Ensuring good air circulation around the plants is another essential step as you grow and care for lady finger effectively.
7. Flowering, Pod Development, and Harvesting Lady Finger
One of the most rewarding parts of learning how to grow and care for lady finger is the harvest. Lady finger plants begin flowering around 40–50 days after planting. Shortly after flowering, pods begin to form.
Harvest tips:
- Pick pods when they are 3–5 inches long for the best taste and texture.
- Use scissors or garden shears to cut pods to avoid damaging the plant.
- Harvest every 2–3 days during peak production to encourage continuous growth.
Be sure to wear gloves while harvesting, as lady finger plants have tiny spines that can irritate the skin. Regular harvesting is not only good for yield but also supports the overall health of the plant as you grow and care for lady finger.
8. Tips for Growing Lady Finger in Containers
Urban gardeners can also grow and care for lady finger in containers. Choose a large pot (at least 12–14 inches deep) with proper drainage holes. Use nutrient-rich potting soil mixed with compost.
Container-grown lady finger plants require more frequent watering and fertilizing. Place the pots in a sunny spot and stake the plants as they grow taller. With proper attention, container gardening is a great way to grow and care for lady finger in small spaces like balconies or patios.
9. Seasonal Care and Companion Planting for Lady Finger
To grow and care for lady finger throughout the growing season, seasonal maintenance is necessary. Remove dead leaves regularly and support tall plants with stakes.
Companion planting is also helpful:
- Good companions: Basil, onions, peppers, and marigolds (they deter pests).
- Avoid planting near cucumbers or squash, which may compete for nutrients.
Seasonal adjustments help optimize conditions and keep your lady finger plants productive throughout their lifecycle.
10. Final Thoughts: Mastering How to Grow and Care for Lady Finger for Healthy Harvests
Whether you’re planting your first seed or expanding your home garden, knowing how to grow and care for lady finger is essential for a rewarding harvest. With the right soil preparation, planting techniques, pest control, and harvesting schedule, you can enjoy a continuous supply of fresh, tender okra from your own garden. The ability to grow and care for lady finger not only saves money but also offers a chemical-free, nutritious vegetable straight from nature. Embrace these practical gardening techniques, and you’ll be harvesting healthy lady finger pods in no time.